Jul 20, 2011 |

all images copyright Stampin' Up!
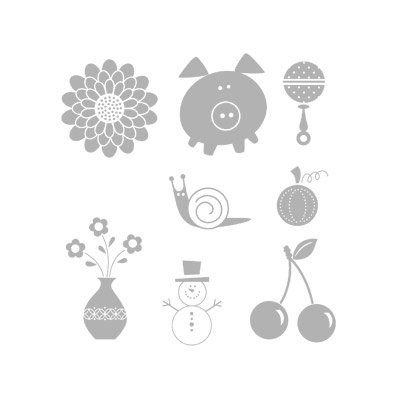
This adorable, versatile stamp set is called Button Buddies. Stampin’ Up sent it to me to make samples for the Buttons Booth at convention. I’ll be uploading at least 5 videos and more samples this week from my demonstration there.
Today I’m highlighting the cherries!

Here is the video!
You can order Button Buddies (and buttons, and the scallop envelope and all other supplies) on my SU Website HERE or just give me a call or email!
Linda
Dec 16, 2010 |
This is a really clever idea from one of my Stampin’ Up demonstrator downline here in FL, Emily Turner. Emily comes up with these classy ideas often and since we are friends, I get to see them often which is wonderful!

The ones above are using the vanilla hodgepodge hardware from Stampin’ Up! in the main catalog, page 188. Emily said she is using these for tags on their Christmas gifts this year. (and as a side note, these kids are mostly grown up now, so getting their lil’ mugs on their presents will be so fun!)
I asked her to share how she made them at our demonstrator get together a few weeks ago and of course I turned on the camera so you could see, too! (caution: live video at our meeting so pardon the extra noise)
Hodgepodge Hardware comes in 2 color finishes, Styled Silver and Vanilla. 100 embellishments and 100 brads in the tin for 29.95.

Here are some close up shots (some are a little blurry but you get the idea…)

Emily's poodle, Theo

Emily's little princess, Emma

Stamped back of ornament
Thanks for sharing with us, Emily!!
Linda
Nov 24, 2010 |
(if viewing from a feed in your email, you may need to come back to the blog to see video)
I still have a few videos left to share with you from our Stampcation event. Here is another LIVE (which means stampers commenting and applauding throughout the video) project created by the very talented Shantaie F0wler:
Shantaie folder embossed our Stampin’ Up fabric, Candy Cane Christmas! (which is on SALE right now, 1/2 off for 4.95 instead of 9,95!) She used the Big Shot Adhesive roll to add some stiffness to the fabric so it can be embossed and stay embossed. Clever!

| Candy Cane Christmas Designer Fabric #121715 |
|
| SALE Price: $4.98 |
| REG Catalog Price: $9.95
Expand your crafting options with our new Designer Series fabric for a whole new look and range of project possibilities! Coordinating patterns in our playfully striped and polka-dotted Candy Cane Christmas bundle make it easy to create colorful, eye-pleasing projects. Combine with our Candy Cane Big Designer buttons for even more easy coordination. And of course, this fabric is a perfect medium for creating all kinds of beautiful Christmas projects using the Big Shot machine and our large collection of dies.
■ Combines exclusive designs and colors with high quality fabric
■ Coordinates with other Stampin’ Up! products
■ Extra wide fat quarters
■ 100% cotton
■ Includes instruction booklet highlighting five projects you can create using fabric
■ Coordinates with Garden Green, Baja Breeze, Blushing Bride, Real Red
■ Coordinates with Candy Cane Christmas Suite
■ 28 x 18”
■ 3 coordinated designs
|


Big Shot Adhesive Roll 14.95 #120805
12 sheets , 12 x 12 in size. Lots of ’em!
Scroll down here on the blog if you missed the big sale announcement and the 1/2 off starter kit promotion going on now!
Online orders can be placed here or you can always call or email me anytime! Maybe you’ll catch me out buying a pie.
Gobble, Gobble…
Linda
Nov 9, 2010 |
Hi stampers! Here is another Stampcation “LIVE” video (which means lots of chatter and applause) from our big event here in FL a while back. Life’s been busy for us here over the last few months, so the videos are still being edited in our ‘spare’ time!
Kim Moorehouse is a very talented demonstrator here in Florida. Some of the stampers at our event said “Linda, you have got to see what Kim has created” and when I did, I asked her to hop up on stage and show everyone.
She graciously got up there with no prep time and wowed the crowd!
The video below shows how she used glossy photos and a little StazOn ink with rubber stamps to create some really beautiful cards.
I wish she had a blog I could send you to to view more of her things but we are still trying to talk her into it…
Linda
Oct 5, 2010 |
At my last demonstrator get together, Trish Niedergeses shared a fun technique with the group. Using a rubber brayer and some classic (dye based) ink rolled over an embossed, raised image she created some really neat cards. She is quick to say she ‘cased’ the technique and yellow card from Stampin’ Connection (our demonstrator only share website) from someone but couldn’t remember the name of the original artist. (and if the artist happens to be reading this, just email me and I’ll give you the credit you deserve! Great Card!)
And remember, it’s a live video at our get together with over 40 women so pardon the applause and comments!
Take some time to stamp for YOU today!
Linda
Sep 24, 2010 |
(if viewing from a feed in your email, you may need to come to the blog to view video)
Stampin’ Up doesn’t carry those great Spectrum/Kaleidacolor rainbow pads any more and I sure miss ’em!
I’m sure you can find them somewhere in the stores but since I’m a demo and we don’t carry them, I tend to use what we sell so I’m forced to get a little crafty….
In the holiday mini catalog, we now sell uninked craft pads, mostly since we don’t carry the big craft pads but only the spots. (Craft pads are the foam pads with pigment ink, which is more wet for heat/powder embossing and is permanent once air or heat dried)

So I did some experimenting about a month ago and decided to try to recreate the old rainbow pad days. I used a few colors of Classic (dye based) ink refills on the foam, uninked pad. I scored it with my scissor blade in the different sections to help keep the colors contained, although I’m not sure it really made a difference to do that. I used the ink refill tip to draw and keep the colors apart anyway:

It’s a little messy since I’ve used it a bunch since I made it.
I tried to use a rubber brayer to ink up the colors and roll on glossy card stock – what a mess! Didn’t have the effect I was hoping for but then I used the rubber brayer inked up to roll across our new, BIG stamp in the holiday mini called Christmas Collage:

Here is the video (it is another ‘live’ video from Stampcation so pardon the extra applause and chatter!)
My custom ink pad order of inks: Pacific Blue, Old Olive, Tempting Turquoise, Rich Razzleberry and then Old Olive again. All classic ink refills. SU’s Glossy card stock (which can’t be beat) and Pacific Point card stock card. Old Olive Satin Ribbon, Silver Tinsel from Holiday Mini and a Rich Razzleberry button from the Brights button collection.
Happy Stampin’ !
Linda
Sep 21, 2010 |
Here is another live video from our Stampcation event a few weeks ago. Shantaie Fowler (my event partner) shared a demonstration for her paper fortune cookies, which would be so fun for any anniversary or valentine’s love notes!
(remember this is a live video, so lots of chatter from the audience!)
Shantaie is sharing the template she used in the video! You can visit her blog at http://www.inkingpink.com or
|
click the link to download printable template:
|
Linda
Sep 17, 2010 |
I’m playing catch up this week after our big Stampcation event here in FL. I tried to video most of the demos that were on stage that day. It’s a LIVE video with little edits and with 100 demonstrators having fun, it is a loud video! Shantaie, my Stampcation partner, demonstrated this great magnetic board and a little organization trick:
The Specialty Designer paper she used is in the Holiday Mini catalog and is called Autumn Spice – love it!
Linda
May 25, 2010 |
Miss me? Just making a funny – I’m not that much of an egomaniac to think you’ve been checking every day to see what’s new but I did get one email asking if I was still alive! Thankfully, yes although Matt and I have had a roller coaster of a month. After being back from the Stampin’ Up cruise only a week, I got the call that my Aunt Julie died in Michigan (my dad’s older sister) and we got back on a plane to take care of things. Julie never married, no children and had worked for the State Department her whole life. She lived overseas in exotic places until she retired to a house on Lake Michigan. She despised the cold weather so I still got to see her in FL every year! We spent the week reflecting, clearing out her home, donating things, a little service with neighbors and settling affairs . She taught me how to play Scrabble and in the last years, I finally was able to win some games (much to her chagrin, having been in a Scrabble group where they played in 3 languages!) She was fabulous, frustrating, generous, stubborn and a real lady all in one. I’ll miss her.
So! On to happier stamping notes…
I had a request to do a video on the new Presto Patterns Specialty paper in the Summer Mini Catalog for Stamping School. While I normally don’t post those videos here, I decided to do an extra video this week (so the members still got their usual 2 exclusive projects) and share this one with you. It’s really neat paper to alter and in this video, I ‘colorize’ it 6 ways.
(If viewing this post from your email, you may need to click here to see the video at the blog)
The Retiring Stamp List comes out June 1st! If you haven’t ordered your favorite ink refills for your retiring color ink pads you have, better call or email me before the end of this month!
Linda