(if viewing from your email, you may need to come to my blog to see videos)
Before we go on, if you don’t know what Sizzix Framelits are you can watch this introduction video by Stampin’ Up’s Donna Griffith:
I’ve been playing with these Sizzix Framelits since December when Stampin’ Up added them to our catalog. They are really growing on me and I really like them! I had played around with turning them upside down to emboss the shapes rather than just cut out the shapes but I was a little leery in sharing in case they ruined the cutting edge.
Now we are into February, lots of stampers have been embossing with them, and mine are doing fine with the method I have used so I feel comfortable sharing how I emboss with these fun new dies!
I made 3 quick videos for 3 different versions of embossing/debossing with the framelits: (embossing is seeing a raised edge and Debossing is seeing an impression or depression in the paper)
I’m using the SU Sizzix Labels Collection Framelits Dies (item # 125598) for all my videos. $26.95 for a set of 6. This is what the paper shapes look like once you cut them:
This first video is the basic way that I emboss a frame or shape. I’m using the Labels Collection for all my videos, which are One side of the Framelit has a lipped edge on one side. By flipping it over and placing your card stock on top of a silicone rubber pad (from Sizzix) you can allow the rubber to cushion and help create the impression of the frame.
Here is the video:
The next technique was just me experimenting and wanting to see the impression better. So I inked the flat side of the framelits with VersaMark, which is a great watermarking ink. I call this Watermark Debossing since it’s the deep impressions that are darkened:
Here is the video:
And lastly, I was playing around with Debossing a Textured Impressions folder image. So I played around with different embossing folders, like the Square Lattice folder. I ran the frame on top of the embossed card stock and it smoothed the design away to leave the frame. It looks great in person so give it a try! I just finished a pretty card using it for one of this week’s Stamping School videos.
I goofed around and called it TID for Textured Impressions Debossing. Quite a mouthful as you will see that Matt threw in my bloopers at the end (he just loves it when I mess up and I do it often!)
Here is the video:
Remember that it’s still Sale-A-Bration which means FREE gift with $50 purchase! Read all about it HERE and get in touch with me to place an order during this great promo!
Today I opened up my box of Occasions Mini pre-order goodies (one of my favorite perks for being a demo is getting things early to play with!) I don’t want to spoil the surprises for you when you get your mini in the mail but a little peek is fun, right?
I can’t make videos for all the new things until it officially goes LIVE on January 4th but I can make something and take a picture to share! This one went together in minutes….
Created by Linda Heller (all images copyright Stampin’ Up!)
I’m in LOVE! These are called Designer Cuts and they are an item in the Occasions Mini catalog under Cards & Envelopes Set. The cards are laser cut and I was thrilled to see it was ready to go, which means I didn’t have to poke out all the itty bitty pieces from the cuts. in Very Vanilla with Blushing Bride envelopes. I cut the front of the vanilla laser cut card and then cut it down 1/8″ on all sides to adhere it to the front of a Blushing Bride Card.
The DSP is new also, called Twitterpated, which has this Blushing Bride pattern. I adhered a 2″ strip across the top . Then I added the NEW 3/8″ Pleated Satin Ribbon in Blushing Bride (which is so pretty and no bows!!) across the middle.
The greeting is also a sneak peek from the mini called Loving Thoughts, which has so many pretty sentiments you will use over and over.
Here is a close up of the delicate card details:
Oh, forgot to tell you about the big pearls, too! Those are new!
Must go unpack the rest of my goodies so happy stamping!
It’s been a busy month after Stampcation, which was AMAZING! The presentations were awesome with demonstrators up on a stage showing their WOWS and I loved the sound of 100 stampers cheering throughout the weekend!
Our theme was Releasing Your Inner Artist so the displays were themed around art and color vignettes throughout the room. I’ll share a few photos with you…
Shantaie Fowler is my friend and Stampcation partner. She is really the creative force behind the amazing, over the top displays. We have learned that we excel creatively when bouncing ideas off of each other so it’s a perfect match. Here she is hanging the paper lemons on the tree for the yellow display area.
Of course we couldn’t pull it off without help! Matt, Toni, Penny, Dave, Megan, and Nate were on the scene to haul in displays (from our rented trucks LOL) and help pull it all together.
My amazing, glass half full guy, Matt! At the control panels controlling audio, microphones, projectors, visual slides, video….quite the job well done!
Shantaie’s creation using the SU fabric, Beau Chateau on her apron for the pink vignette area. Isn’t she fabulous?! Shantaie is quite the seamstress as well as papercrafter.
We had this great area for a photo opportunity with stamped mustaches and a big frame! It seemed to be a big hit and saw people there all weekend!
The 8 presenters were amazing! Nance Lempinen-Leedy did a great demo on the insides of cards. I loved this card she did for fall…
Lots of swapping! 4 Line swaps for card fronts, 1 3D line swap and then a big shoe box swap! Here are a few of those:
She used the stocking hanger loop in the stamp set to make hoof prints!! We were all roaring at her creativity!
This one is stamped by Connie Hobbs – I loved it and using the Marina Mist patterned paper with the Frostwood Lodge paper looked so fresh and bright!
The scrapbookers were out in force, too! I took this pic because of the table….where did they find room to scrap? LOL
Really a great time!
By the way, the month is ticking away for the FREE BIG SHOT promotion! If you want to sign up as a business or hobby demonstrator, get in touch with me before the end of October!!
The Stampin’ Up events team loves to create these little vignettes around their theme. For the Founder’s Trip last weekend, I took a few snapshots of little ‘moments’ scattered around the hospitality areas, bookcases and displays.
I love the covered books with our designer paper!
The paper shreds in the glass bottles…
Pretty paper flowers
I have a watering can off my porch I need to cover with DSP and bring inside!
After a day of shopping, talking, eating, more talking and more eating, we got ready for our surprise night out. Stampin’ Up arranges something wonderful on our last night and we don’t know what it is until we arrive!
Backing up a bit, SU started something new last year to help us get to know eachother. When we arrive, our nametags have a special team name on it and we are to find our 6 other team members. Our team was called the White Gloves! So Janet Wakeland (one of our white glovers) in all her “resourcefullness” , brought us all white gloves and pearls! So if you see white gloves in the pictures later, you will know why. We had dinner together that first night.
Since the theme this year is Tea Party (and I don’t think I posted our dinner pictures from that first night where we all had a tea cup with roses at our place setting so I’ll insert a quick pic here)
So when the bus arrived to take us to our secret location, the White Gloves were to get on the same bus to go to an activity. We pulled into the golf course and wondered if we would be golfing but of course, SU had another idea for us.
Good grief, what do they have in store for us?
Our team of 7 had 4 golf carts, a map and a bottle of water and off we went!
We had the BEST time working through crazy games and challenges as we sped through the golf course!
The view was incredible as we drove around the course!
Fellow White Glovers, Patty Bennett and Janet Wakeland
I love this picture of Jan Wakeland with our shadows cheering her on!There were bunnies everywhere! (and we didn't hit one, but we missed a few by a hare..)
We decided that we would just use a few cameras and share pictures so we didn’t have to have other teams wait on us. So I don’t have our group pics to show you yet! My White Gloves team: Patty Bennett, Judy Garza, Kristin Kortonick, Janet Wakeland, Patty Chenail, and Cindy Baughman. We laughed a lot and although we didn’t win, we had a blast!
There were bunnies everywhere! (and we didn't hit one, but we missed a few by a hare..)
Shelli was running the marshmallow relay, where we had to balanced a marshmallow on a golf club, run around the flag and bag without dropping itThere were bunnies everywhere! (and we didn't hit one, but we missed a few by a hare..)
A roadrunner!!
After we made it through all the challenges, we sat down to a lovely dinner: At our dinner table, we had a trophy filled with markers!
Our centerpiece with our team name….
And after full tummys and a bus ride back to our hotel, we ran up to our rooms to see what SU left us as our last pillow gift!
It was a sparkly fob of sorts to hang on our purse or whatever we might want to use it for! It has a tea cup with an FC and Founder’s Circle 2011 on the bottom:
It’s finally September 1st and I’ve been just itching to post the Holiday Mini Catalog on my blog! I had great intentions to wake up at 2 am to write this post as soon as Stampin’ Up loaded all the documents for us. BUT I have a vicious cold and took some of that lovely nighttime medicine and that’s all I remember….until 8 am this morning!
If you are a customer of mine, you should have received a copy of the mini in your mailbox. If you didn’t, maybe it got lost, the mailman ate it or your address changed. Drop me a line and I have extras here on hand that I can mail to you.
If you’d like to view the Holiday Mini Catalog online, click HERE.
Do you like to know the supplies to make the projects in the Holiday Mini such as ink colors, stamp sets, etc? I have the Stampin’ Supplies list HERE for you to print or save on your computer.
Of course all the catalogs and supplies are always up on my Demonstrator Website 24/7! www.lindaheller.stampinup.net You can shop there online
What is my FAVORITE THING in the Holiday Mini? There are many wonderful things in there but ONE is a must have if you are a paper crafter. We have waited a long time for this beauty, our Simply Scored!
Here is what SU says about the Simply Scored:
“Take the chore out of scoring! The Simply Scored Scoring Tool’s base fits paper or card stock up to 12″ x 12″ and features score tracks every 1/8″. Features two easy-to-read rulers (with inch markings down to 1/8″) along top and left side for perfect scoring. (One standard left-to-right ruler and one zero center ruler.) Includes three markers and stylus. Bottom of base has non-marking and nonskid feet to secure it on your work areach Base measures Approximately
15-1/8″ x 13-1/4″ x 1”. 29.95 Item # 122334
I will be honest and say that I have compared it side by side, right next to the ‘martha’ brand scoring board. I wanted to see which one was better.
Here is my Stampbusters evaluation: M’s is white and to my eyes, harder to read the numbers. It has score lines at every 1/8″ just like ours. (which is SO important for all projects to have those increments). It has a storage area at the top end just like ours. It has numbers running down the side, just like ours, which should be mandatory on all of them! They both have a zero center ruler, which is helpful for some projects.
Here is where the differences start to come in. M’s has a triangle tool and we don’t. Not a huge deal, I can get a triangle tool ruler anywhere but it would have been nice to have it.
M’s has a plastic bone folder rather than a metal stylus like ours. (ours does come with the metal stylus it when you buy it) My first scoring board (called itself a pal but it wasn’t much of one with it’s ambiguous measurements) came with a plastic bone folder tool for scoring. After a few months of using it, it had worn away and created a big dent. We papercrafters do a lot of scoring so it has to hold up! The Simply Scored comes with a nice metal stylus, rubbery not slippery handle, and the ends have 2 sizes for your scoring needs.
The other advantage the Simply Scored has 3 place markers that come with it! I am loving these markers because it is easy to lose your place with so many little lines. Ever score a piece of card stock and realize you were off the track? Now I just leave one at the 4-1/4 and one at the 5-1/2 and it’s so easy to see. If I’m preparing a bunch of tri-fold cards, I can move the markers to those exact measurements and zip through a project!
If you are still scoring your projects on the old fiskars track with a butter knife or scoring blade, you just have to get one of these. No more lifting up the track each time you need to score one piece of paper.
If you are a member of Stamping School, I’ll be doing a video on my new favorite thing this weekend!
And by the way, some of you have been asking questions about the new Stamping School that will be going LIVE soon. Yes, we are hoping for a September release date and are in the testing stages now. Y’all are going to love it! Ipad and Iphone users will be able to watch all videos, too! I’ll keep you posted.
This isn’t Button Buddies today but something else I showed at my button booth and displays at convention.
I had SO much fun playing with all of our accessories to spruce up buttons! Everything you see here is Stampin’ Up! accessories.
Linda Heller
Here’s some more detailed, up close pics
My favorite is the heart & arrow using glimmer pape and a clear heart button! Linda Heller
Linda Heller
So dig thru your box of “this & thats” and create your own unique accessories to doll up your projects! I’d love to see what you come up with so email me your creations and I’ll post them here. Linda
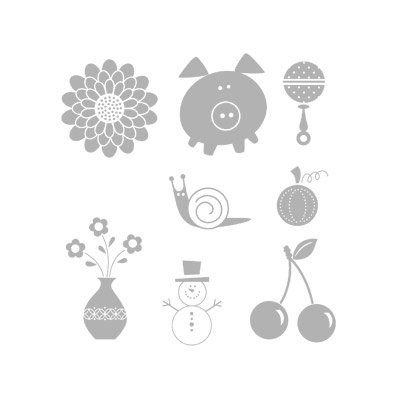
This adorable, versatile stamp set is called Button Buddies. Stampin’ Up sent it to me to make samples for the Buttons Booth at convention. I’ll be uploading at least 5 videos and more samples this week from my demonstration there.
Today I’m highlighting the cherries!
Here is the video!
You can order Button Buddies (and buttons, and the scallop envelope and all other supplies) on my SU Website HERE or just give me a call or email!
Linda Heller-Ind. Stampin' Up
Demo in North Carolina
SU Legal Stuff
All Images copyright Stampin' Up.
This content is my sole responsibility as an independent Stampin' Up! demonstrator and the use of and content of the classes, services, or products offered here is not endorsed by Stampin' Up!