Shiny, new paper is my focus this week!
It is called Naturally Gilded Specialty designer paper, shiny and in 3 metallic colors that compliment lots of projects.
Not available in any catalog or flyer, just a fun new online extra addition!
Naturally Gilded Specialty 12×12 $10 for 6 sheets #161639
I thought it would be fun to use each style of this paper in a card and it did not disappoint!
(except it is hard to photograph with all the shine)
I had to use my iphone to shoot this week’s video, still working on my camera issue….
thx for your patience while I get it fixed and back to normal!
Above is my version and below is the Stampin’ Up inspiration! I used Balmy Blue and they used Pool party with the copper/white paper. Watch the video for a little trick for the inside!
I cut the flowers from the Awash with Beauty paper – no stamping except the sentiment
For the silver/white paper, I brushed on a little Granny Apple Green and Bermuda Bay for a soft glow.
The silver pattern resists the ink nicely!
For the gold/vanilla paper, I added a few gold foil butterflies using the Brilliant Wings dies.
This was so hard to photograph!
This week I played with the gold hoops from the Stampin’ Up annual catalog.
I thought they’d make a sweet little ornament so I added it to a card.
It can easily come off the card since it’s hanging on a brad:
The Poinsettia dies with the red velvet paper really makes a nicely textured flower
altho I had a hard time getting a good pic of it!
(Watch the video below for a better look)
For one day, November 24th , Stampin’ Up will have a 10% off sale from the Annual Catalog!
Over 750 items will be 10% off (or think of it like free shipping since that is around 10%)
There are some exclusions that aren’t on the list Here is the list of excluded items – click here to view PDF
I’ve had quite a few of you purchase one or both of these Stampin’ Up flip card Dies so I thought I’m make a tip video for how to add layers as well as extend the card to create a flap and writing area. (I’m not sure who came up with that original idea to add the flap but well done!)
If you are viewing from your email, click HERE to see video on my blog.
I received many great swaps using the new thinlits and as promised in the video, here are a few of my favorites!
This cute little guy was a swap created by Jill Hilliard. The reindeer is from the SU Holiday catalog called Color Me Christmas
This pretty snowflake card was created by April Lopez. The scallop comes with the circle card thinlits and April used it with SU Silver Foil Sheets.
I wish there was a name written on the back, maybe Iina Lee? I think it had a cello envelope with her label on it, which is long gone!
I love getting a swap every year from Georgia Giguere, who puts her family photo inside! Use the Sizzix Circle framelits and the magnetic platform to make easy circles!
Everyone loves this cute owl punch card by Linda Gutierrez!
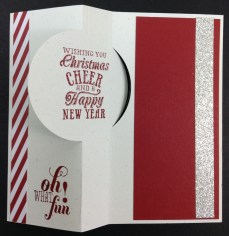
Sandy Hancock made this one and I love how she used the SU Stripes embossing folder on one side of the flip card.
Here is the extended version of the flip card I showed in the video. It’s by Sue Kempter-Miller.
If you don’t have the thinlits yet and would like one or both, here are the 2 options available so far:
Circle Card Item #133480 $32.95
Label Card Item # 133479 32.95
If you have a regular demonstrator you can order from, awesome! If not, you can order online anytime in my SU store at www.lindahellerstampinup.net and click on Shop in upper right hand corner.
Or if you don’t like to order online, you can call me toll free at 866-460-4902 or email me at Lindastamps@cfl.rr.com
p.s. Remember the $25 starter kit special starts today for only 2 weeks, until October 21st! You choose any product between 25.00 and 26.95 plus tax, free shipping! If you have been waiting for a sale, this is a good time to give SU a try or come back if you have been a demo before. See my post HERE from last week to read more about it.
(if viewing from your email, you may need to come to the blog to view video at www.lindastamps.com)
These little kits were SO easy to make! Everything is cut and ready to go in the 2013 Stampin’ Up Holiday catalog, page 27. You will need a Coastal Cabana and Real Red ink pad, glue dots and the stamp set. (or substitute for a stamp set you already have) There is a bundle for both the kit and the clear mount stamps # 133287 for only 17.95. (available in wood mount for a little more) Just the kits are #132158 for $9.95. Kit makes 8 cards and even includes a pre-cut envelope liner!
I did a quick video right out of the package and watch to see how to line up the blue accents on your clear block:
Here is the bundle pic with the stamp set and all you get!
Call, email or shop online to get yours! Make it EASY on yourself this year to send out super cute holiday cards!
I’m popping in for just a few minutes today! I’ve been cutting paper like crazy, finishing up all my 6×6 Paper Samplers/Shares! They are ALL mailed as of this morning and thank you to all who participated with me again this year. I’ll be doing Buttons and Ribbons in a few weeks so stay tuned.
Florida Locals – I have a few Stamp A Stacks this month you can attend in addition to my technique classes.
A Stamp a Stack is an event where you can make 12 cards, 4 designs, 3 each! The cards are less involved but really nice and so fun to get out and stamp. One event is near Goldenrod/Aloma Area and you can read all about it HERE. I have another near Dr.Phillips area and you can read all about that one HERE.
You can rsvp in those links or email me for more information at lindastamps@cfl.rr.com. Demonstrators can attend also as long as there is room. To see all my local classes, go to my SU website at www.lindaheller.stampinup.net
Love to see you all there!
Stampin’ Up released a short video using a technique called Kissing, but adding patterns to solid stamps. It’s an old technique but always fun to see new designs, right?
Being a SU Demo, people think I never go into craft stores but I do sometimes.
Although Stampin’ Up carries a huge catalog of products, they can’t possibly carry it all.
The craft world is MASSIVE, isn’t it?
Sometimes I run into my customers and they hide their baskets behind their back and say “why, what are YOU doing here?!” LOL
I found these up near the register at a local craft store chain:
I believe they were $1.00 each, some had snowmen, some had stars. Just cute little balsa wood boxes, about 3″ wide and 4″ tall.
They just jumped off the shelf and into my cart begging me to adopt them for a makeover.
I braided the Cherry Cobbler Baker’s Twine to make more sturdy handles. I like the way it coordinates with the designer paper that looks woven.
Like I say in the video, you can buy a box quicker than make this BUT why not make it?
It’s fun, you get your craft on, you know you have enough stuff to make 10 of them 🙂 and it feels so GOOD to give something that you made with your own 2 hands.
Supplies From the Holiday catty:
Festival of Prints paper stack (page 20), hot glue gun and silicone pad (page 31), Champagne Glimmer paper (page 18), Sanding Blocks (page 6)
From the main catalog: Vintage faceted buttons (page 176), Cherry Cobbler Seam Binding (page 172),
Jumbo Pearls (page 175) glue and paintbrush, Lucky Limeade card stock 1-1/2″ x 10-3/4 for lolly and scored every 1/4″. (go 11-3/4″ for a fuller lolly)
.
I’ve received SO many requests for making the ornamant on the cover of the Stampin’ Up Holiday catalog. Lots here from my blog, from my customers and on Stamping School, also. It’s really beautiful and it’s not as complicated as it looks although a little time consuming with all the stamping and cutting out with the framelits. I had very little directions from SU so I just played around with how to do it my way 🙂
I did add a few rhinestones in the cherry cobbler tulle ribbon. Here is the back that I would personalize to put on a present, bottle of wine or wrapped gift or tree ornament gift:
I also made another version that is a lot quicker without the stamping, so be sure to watch that one after the first one. p.s. the first one is 19 minutes…even with editing, it’s a long one!
p.s. Stamping School Members…this is going up for you this weekend with the recipe sheets and cutting measurements.
Linda
Here is my quickie version, more vintage without glitter (except champagne mist/alchohol spray) and no stamping:
And here is my video for how to make a quickie version if you need to make lots of them!
Florida locals – quite a few of you asked to do this as a class – let me know if you still want to do it after watching the videos LOL
Hi All! I LOVE embossing folders and with the new SU catty, we have 5 new designs! (ok, one has 2 in the package so technically 4, but I’m counting them as 2 designs) They can be overlooked in the catalog so I’m spotlighting them here as well as a video today.
Fancy Fan Textured Impressions Embossing Folder#127751 $7.95
Elegant without being too frilly!
I noticed right away that the new folders are longer than last year’s models. These are around 6-1/2″ long and won’t fit horizontally in the Big Shot. I recently found out that it is b/c the UK stampers have longer cards than we do. I think their standard is 6″ so they are really excited!
With the longer length of folder, we need to adjust and tweak the way it runs through our machines. Vertical designs are no problem and proceed as usual. Horizontal card folds will require the adjustment.
7/15/12 Update: I ended up cutting a 1/4 inch off of my folders so I can use them both directions:) You certainly don’t have to but I like options.
I’m lovin’ it! Sounds like the McD’s jingle but this new tool is cool! I’ve always wanted more than just a triangle piece for scoring diagonal lines. This companion to the Simply Scored Board fits right on top! Has 2 little silicone rectangles to hold it on. It’s larger than a 12×12 sheet of paper so it’s perfect for bigger projects! Scores every 1/8″.
Here’s a quick introduction video:
I realized quickly that I needed templates if I was to strategically create envelopes out of designer paper.
Here’s the video of what I did so I could get this envelope just the way I wanted it:
Want one?
It’s only 11.95! Item number 125586 for the Diagonal board.
If you don’t have the Simply Scored base to put it on, it is 29.95 item # 122334 Comes with double tipped metal stylus (not a plastic bone folder) and 3 place-markers.
Linda Heller-Ind. Stampin' Up
Demo in North Carolina
SU Legal Stuff
All Images copyright Stampin' Up.
This content is my sole responsibility as an independent Stampin' Up! demonstrator and the use of and content of the classes, services, or products offered here is not endorsed by Stampin' Up!


 Specialty Designer Series Paper")


 Designer Series Paper")
")

 Trim Combo Pack")
")


")

 Sheer Ribbon")
 Designer Series Paper")